Illustrations used may not be the same on your Android device.
1. Go to Settings and select Add Account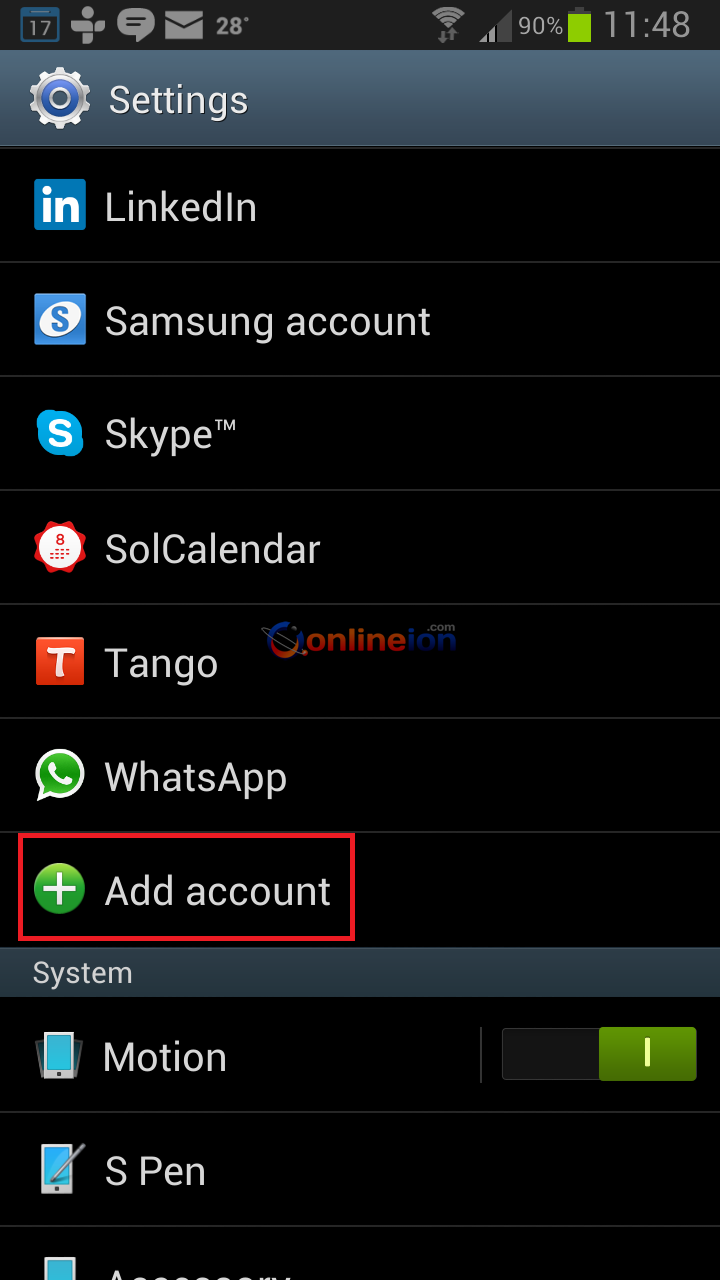
2. Select Email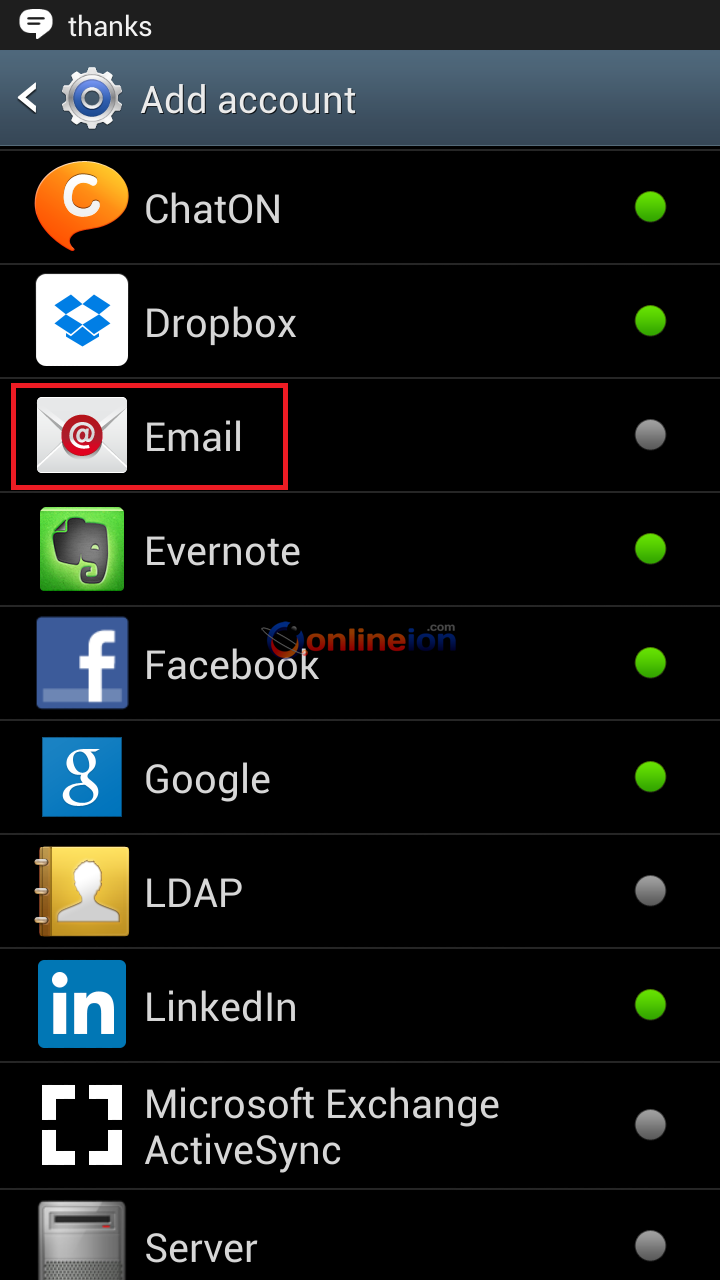
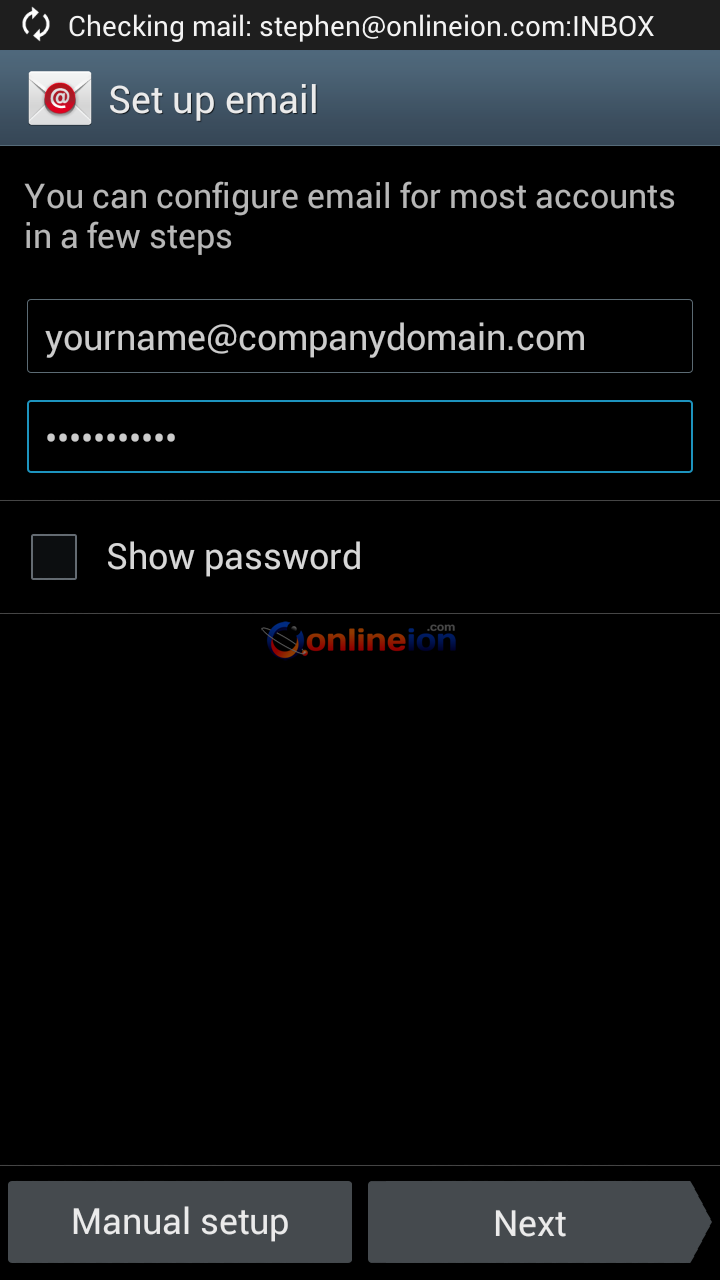
3. 'Set up email' Windows, enter your Email and Password provided to you
4. 'Add email account' Windows, select 'POP3 account'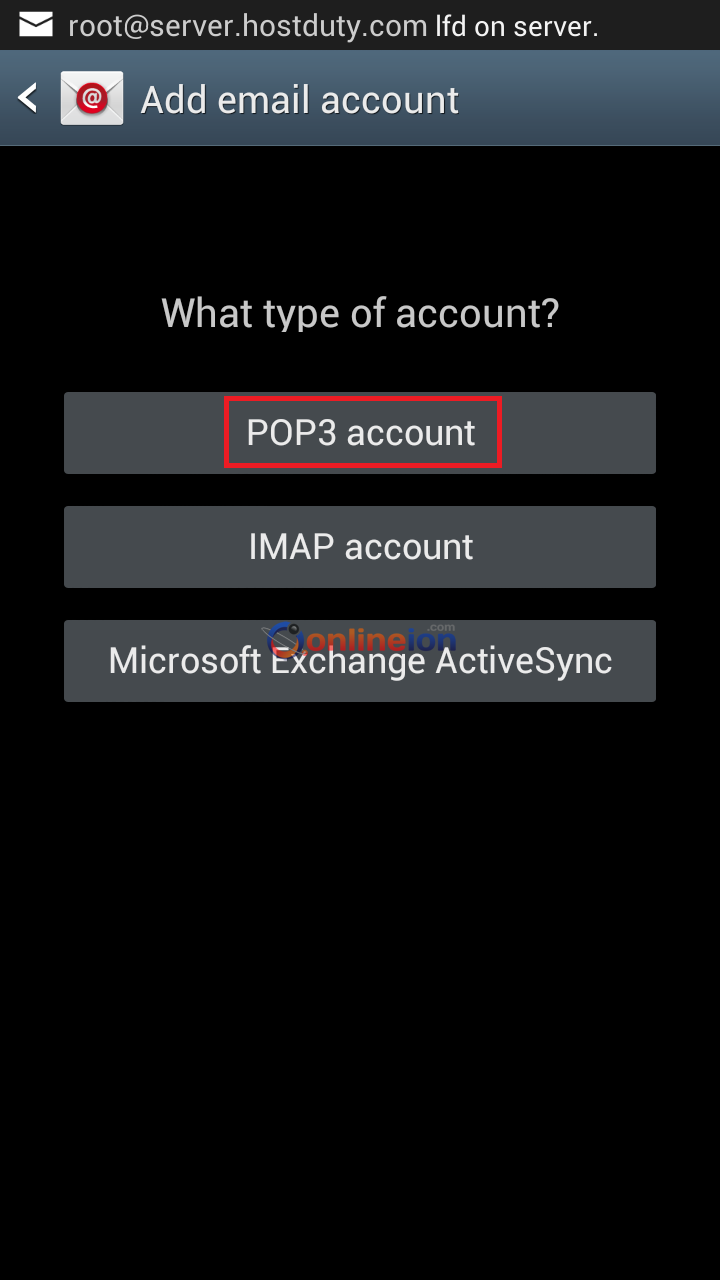
5. 'Incoming server settings', use the credentials provided to you
Username: yourname@yourdomain.com
Password: Your password
Pop3 Server: onlinec1.hostduty.com
Security type: none
Incoming Port: 110 or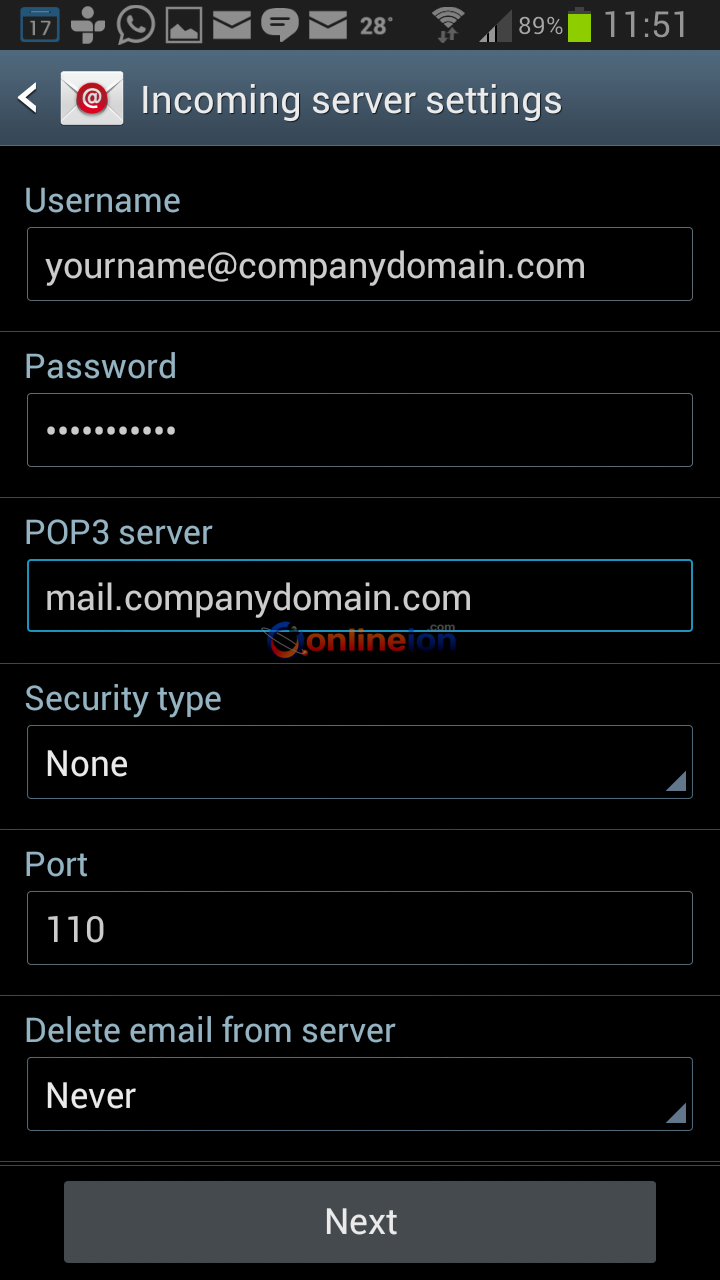
6.'Outgoing settings', use the credentials provided to you
SMTP Server : onlinec1.hostduty.com
Security Type : none
Outgoing Port : 587 or 25
Require Sign-in : Yes
Username : yourname@yourdomain.com
Password : Your password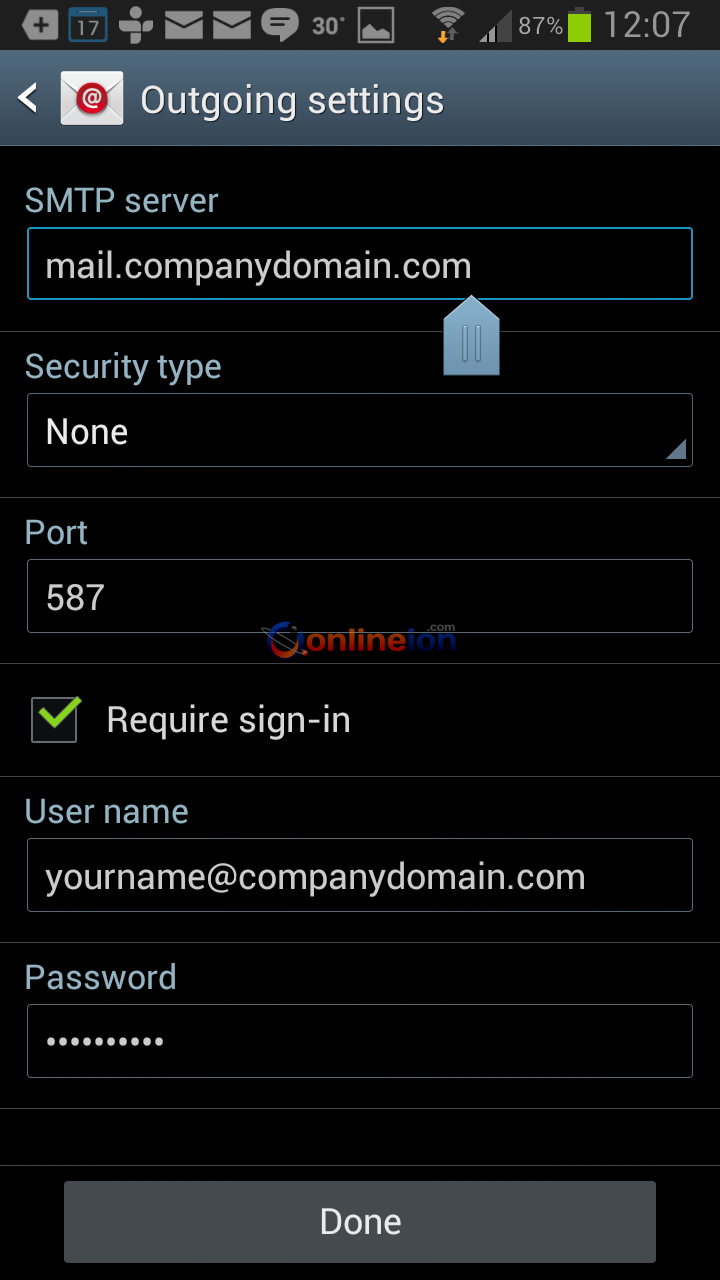
7. 'Account options', to setup Sync settings. Please note that Sync function has to be turned on for this to work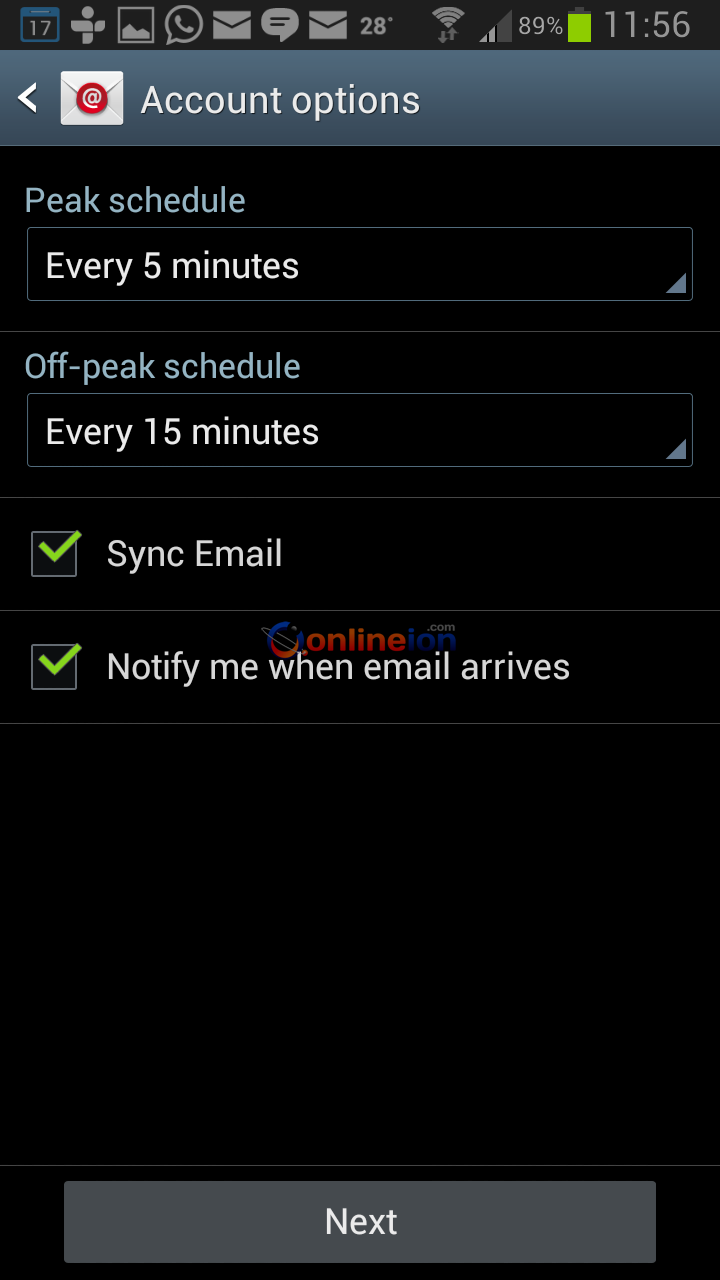
8. 'Set up email' Windows
'Give this account a name' - you may like to assign a name to it, to differentiate with the rest of the accounts you may have.
''Your name' - enter your name to be displayed on outgoing messages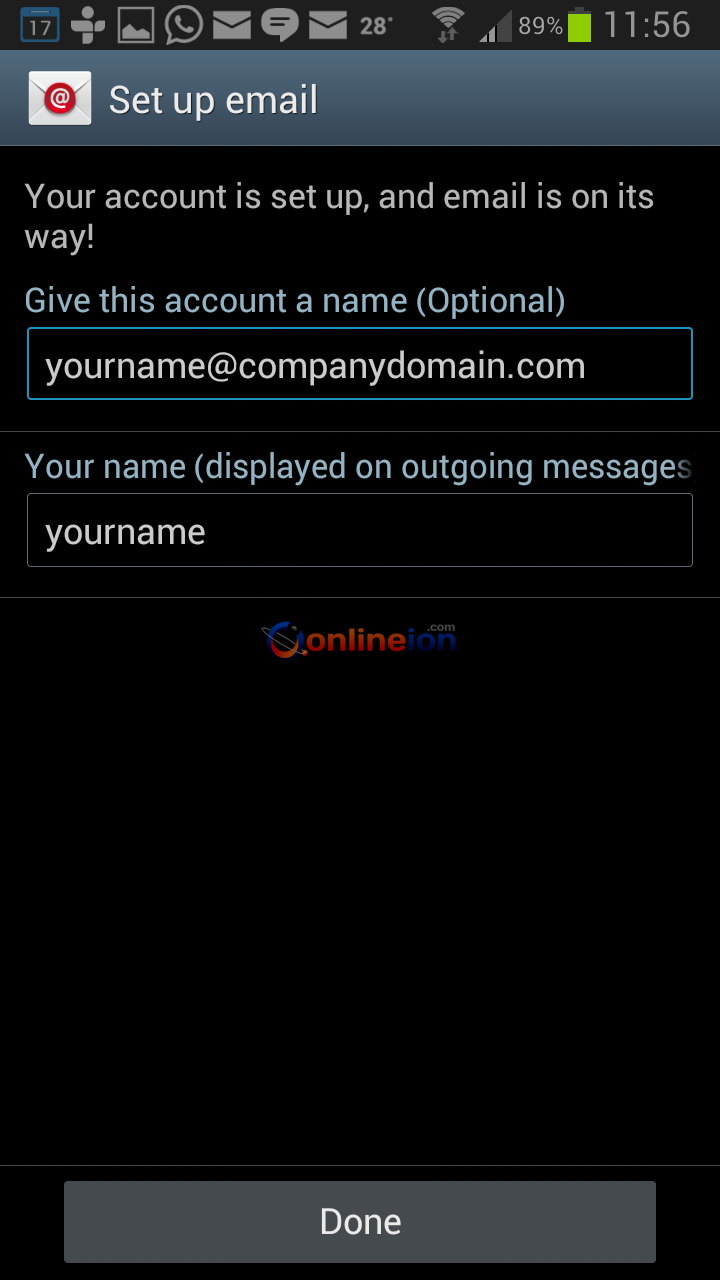
9. Select Done.
You have successfully setup your email account on your Android device. Test it out to make sure send and receive emails are working fine.

